Organising My Making Ideas: The Everyday Wardrobe Journal pt. 1

I have long been obsessed with the idea of the Everyday Wardrobe - the idea of spending my making time on items I actually wear. Over on my Patreon, I have devoted no less than 16 entries to the art of thinking through what we wear, how we wear our clothes, and what we choose to wear, but today I’m back here on my blog to share my Everyday Wardrobe Journal with you. It’s a relatively new tool to me, but I’m so excited to show you my thought processes.

The aim of setting up an Everyday Wardrobe Journal? It’s to guide me through my making year: it’ll help me remember what I need in my wardrobe and what I definitely do not need. My making time is finite and I have decided to spend it more thoughtfully and mindfully.

Caveats before we get started:

  • I dress-make as well as knit, so I do include my dress-making in my journal. However, it’s easy to customise to just include your craft of choice (and also help you purchase the right shop-bought clothes instead of those pesky impulse purchases!).

  • I work as a knitwear designer, so I include my design plans in my journal. That means rather than you getting pattern names to possibly hunt down, you’ll see places in which I write OWN. It just means this is a pattern I need to design/work out.

This is the basic set-up. On the left, I have a page devoted to my colour palette and personal style (these things will be familiar to Patreons) and on the right I have a sort of “wish list” breakdown where I analyse what I want, what I need, and what I make. I’ll break down what these two pages mean today and next week I’ll show you how I organise the rest of the Everyday Wardrobe Journal.

This is my master page.

This page sets out what colours I usually wear, and also tries to explain my personal style in a way that’ll help me assess whether a project is right for me or not. It might look fun, but what’s the point of making something if I’ll never wear it?

Colours: I have divided my wardrobe into Neutrals, Contrasts, and Accents. Don’t worry too much about the Main/Secondary categories - I get a bit finickity about colours and not everybody is like me!

Neutrals: I have chosen navy and brown as my neutrals. These are the basic colours in my wardrobe that go with everything else and which I tend to use for most of my core clothes.

Other people’s examples might be greys, creams, tans, black, or even dark, dark green.

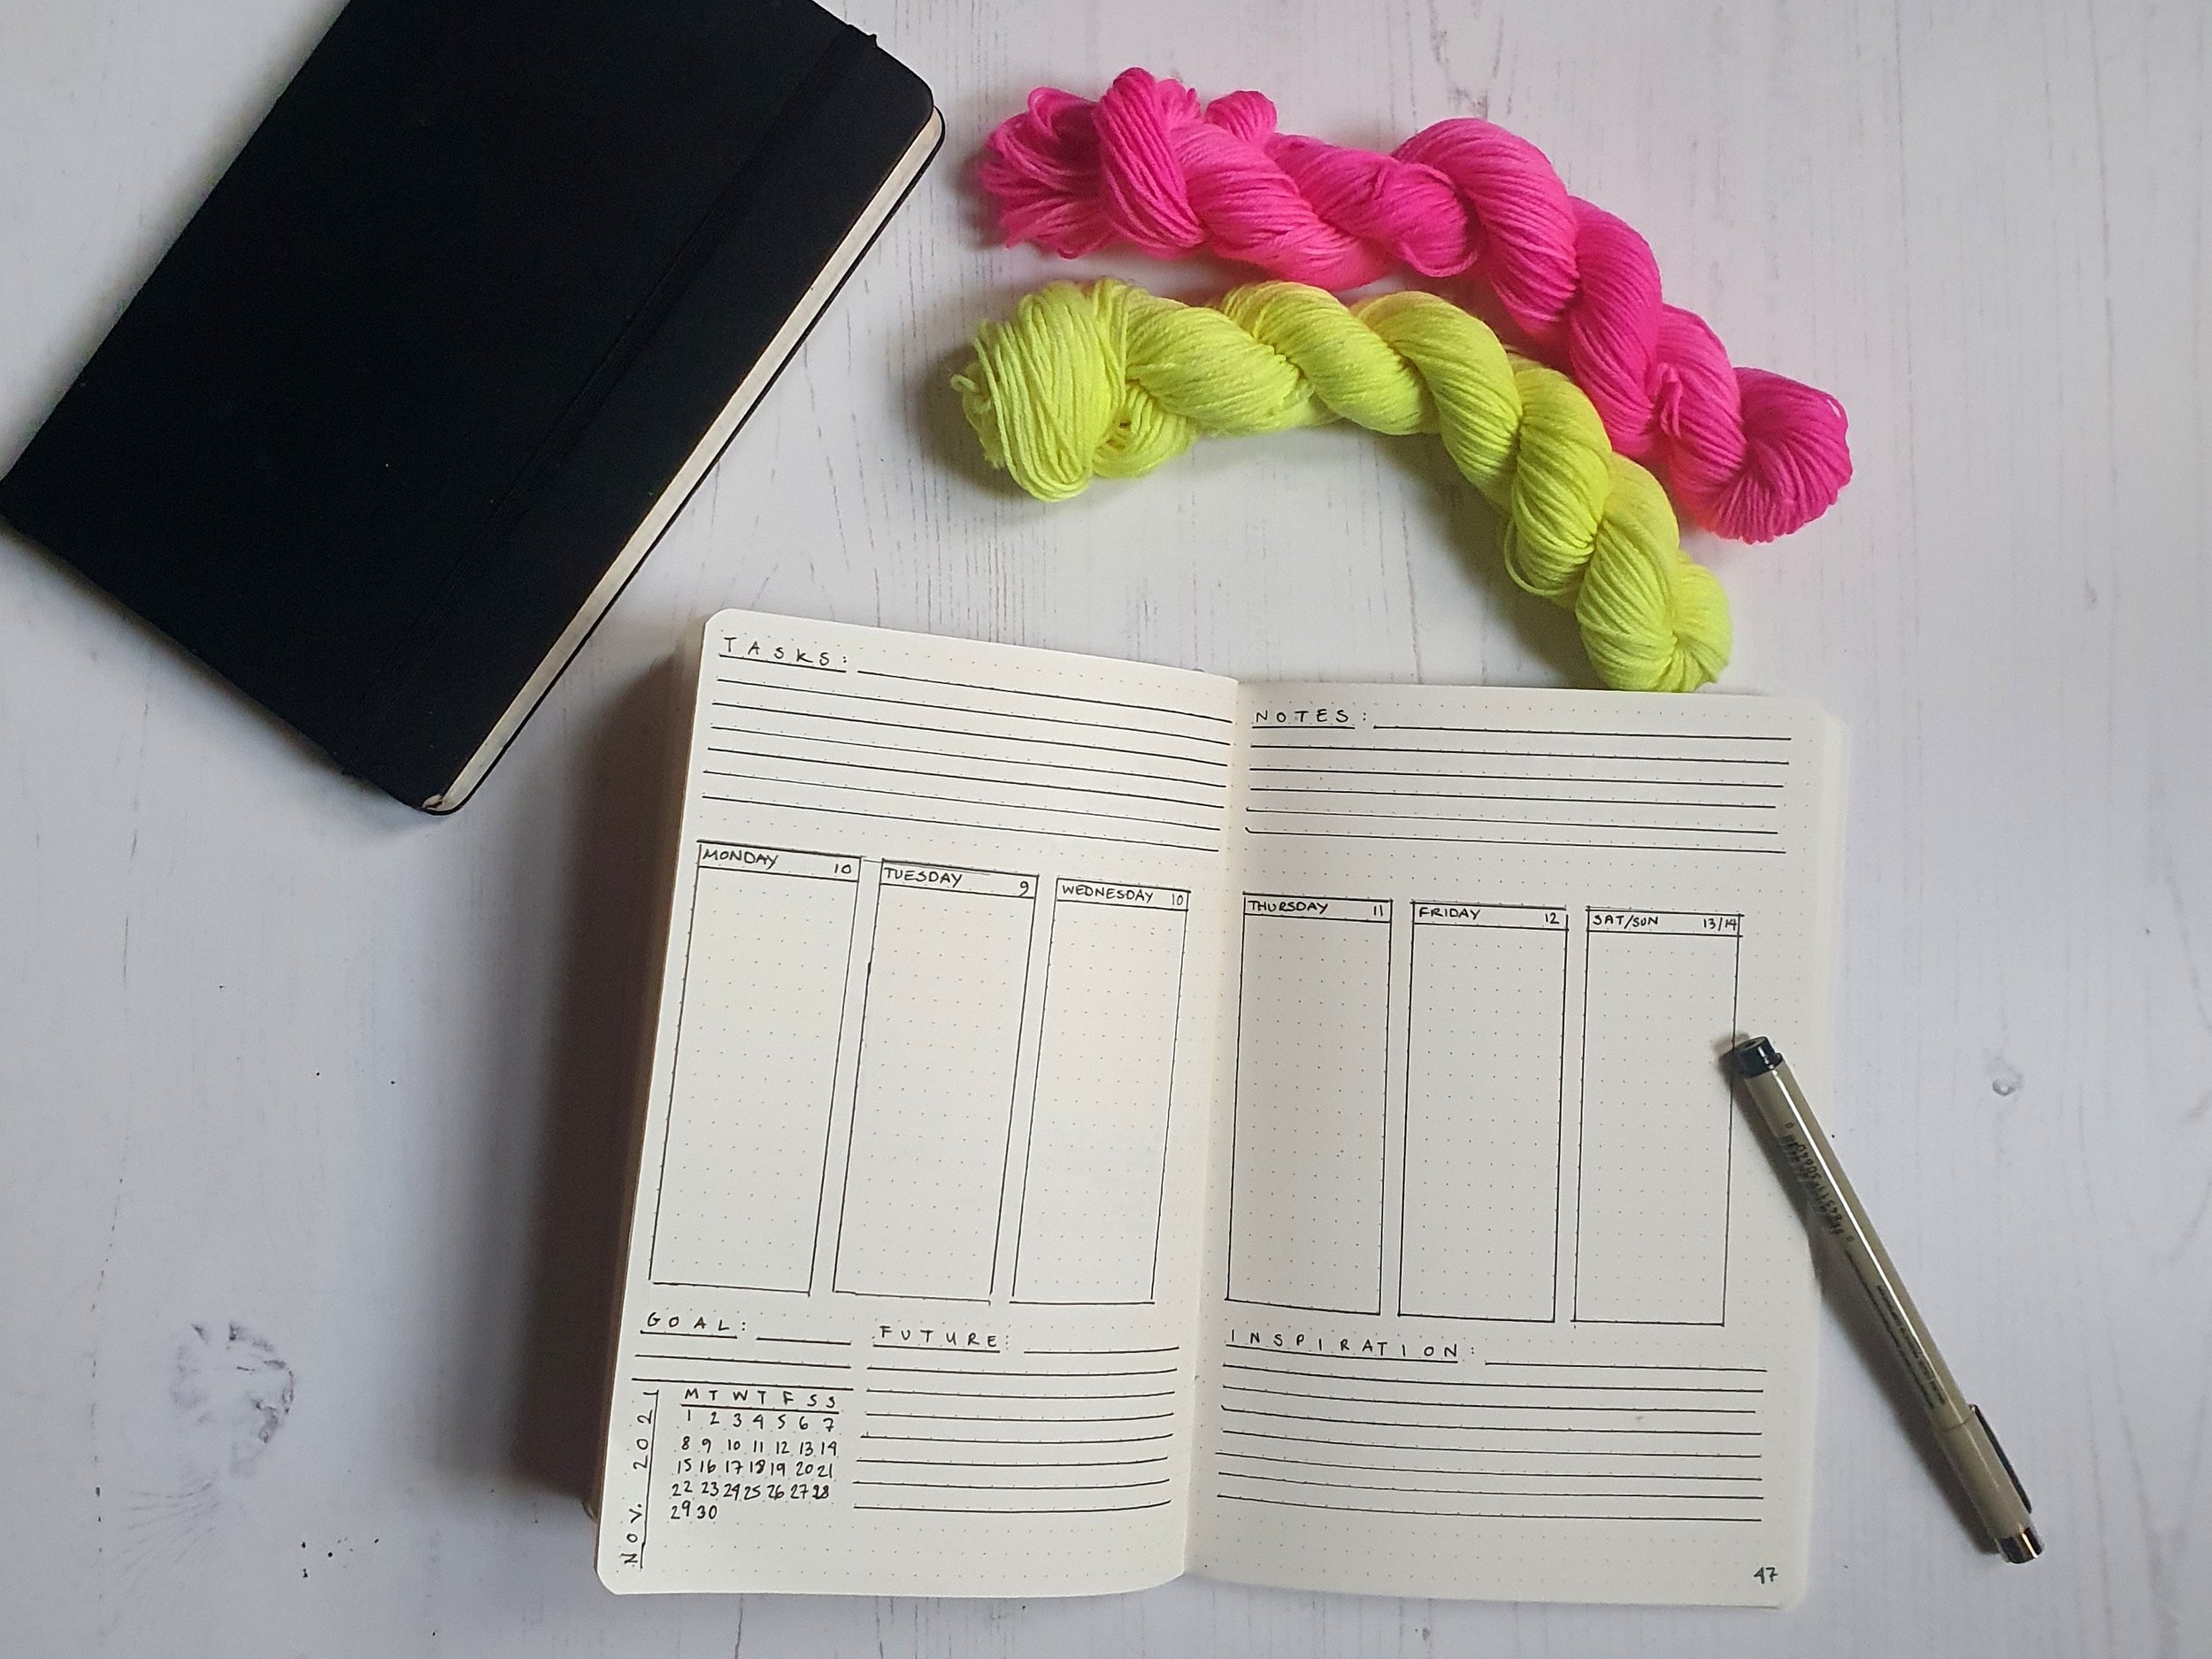
Contrasts: I have chosen mustard yellow and hot pink as my contrasts. They’re the everyday additions that I love adding to my outfits. I would have added teal too, except I have teal hair and it’d be a bit much to have teal-on-teal! I tend to use contrasts for my big makes such as shirts, sweaters and cardigans - though occasionally I’ll add some summer culottes to the mix (as you can see from the header photo).

Other people’s examples might be purples, blues, navy (one person’s neutral is another person’s contrast!), moss greens, wine reds, etc.

Accents: These are the pops of colours I add to an outfit. Earrings, bags, hats, mitts, belts etc. I have added teal and rust as my main accents. When I dress-make, I love fabric that’s either one of my neutrals or my contrasts but which also has one of my accent colours in the pattern.

Other people’s examples might be pink, neon, red, periwinkle etc. It all depends upon your personal style.

You can probably guess that I wear my Catterline sweater a lot!

Then we come to style which is harder to explain briefly. I have narrowed down my style preferences in a way that helps me understand what I should make: 1970s-meet-Bauhaus. It’s not super-accurate but it helps me. Having a shorthand style mantra makes it easy to decide I should not make a cute 1950s tea dress nor should I design a neon-coloured brioche sweater dress. My note on materials>ornamentation also reminds me that I care a lot about the materials I use and that I’m more inclined to wear something which showcases the materials rather than obscure them with sequins, ruffles, or textured yarn/fabric.

Trying to figure out your personal style and making style takes time, but it’s worth it as you’ll stop using your Making time on things you’ll never use!

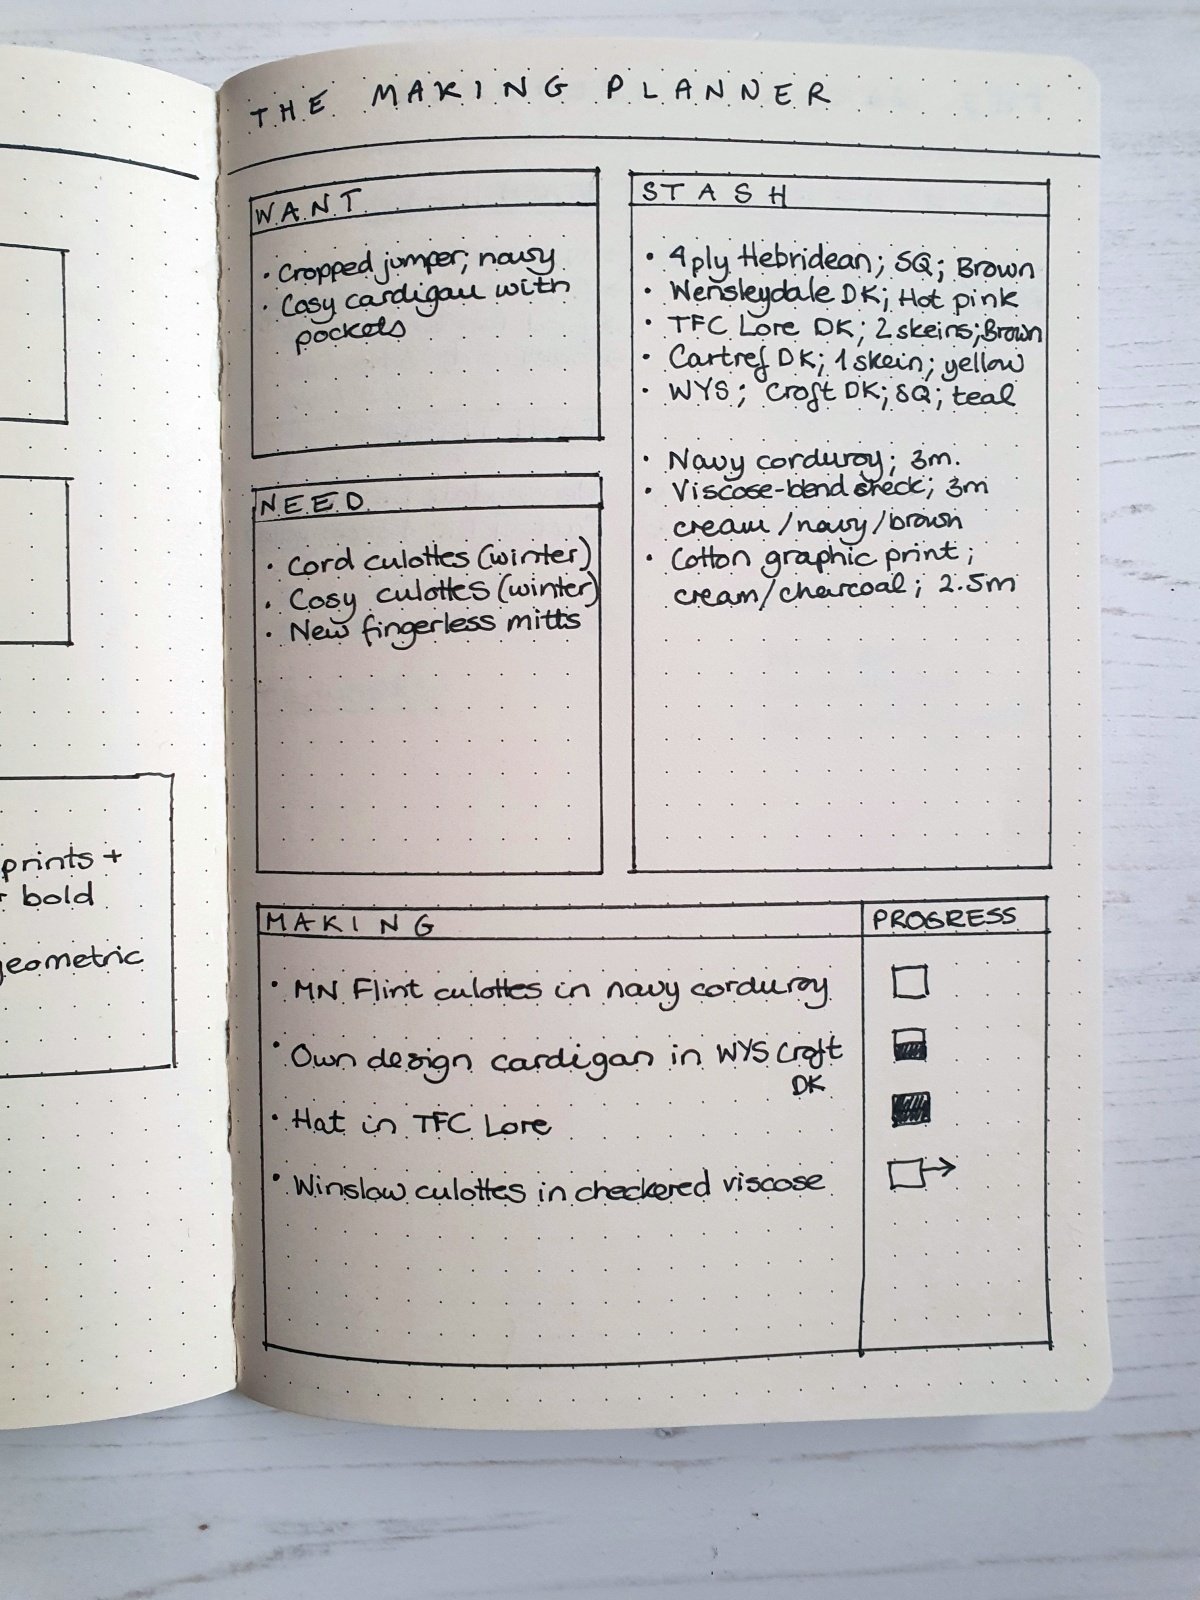
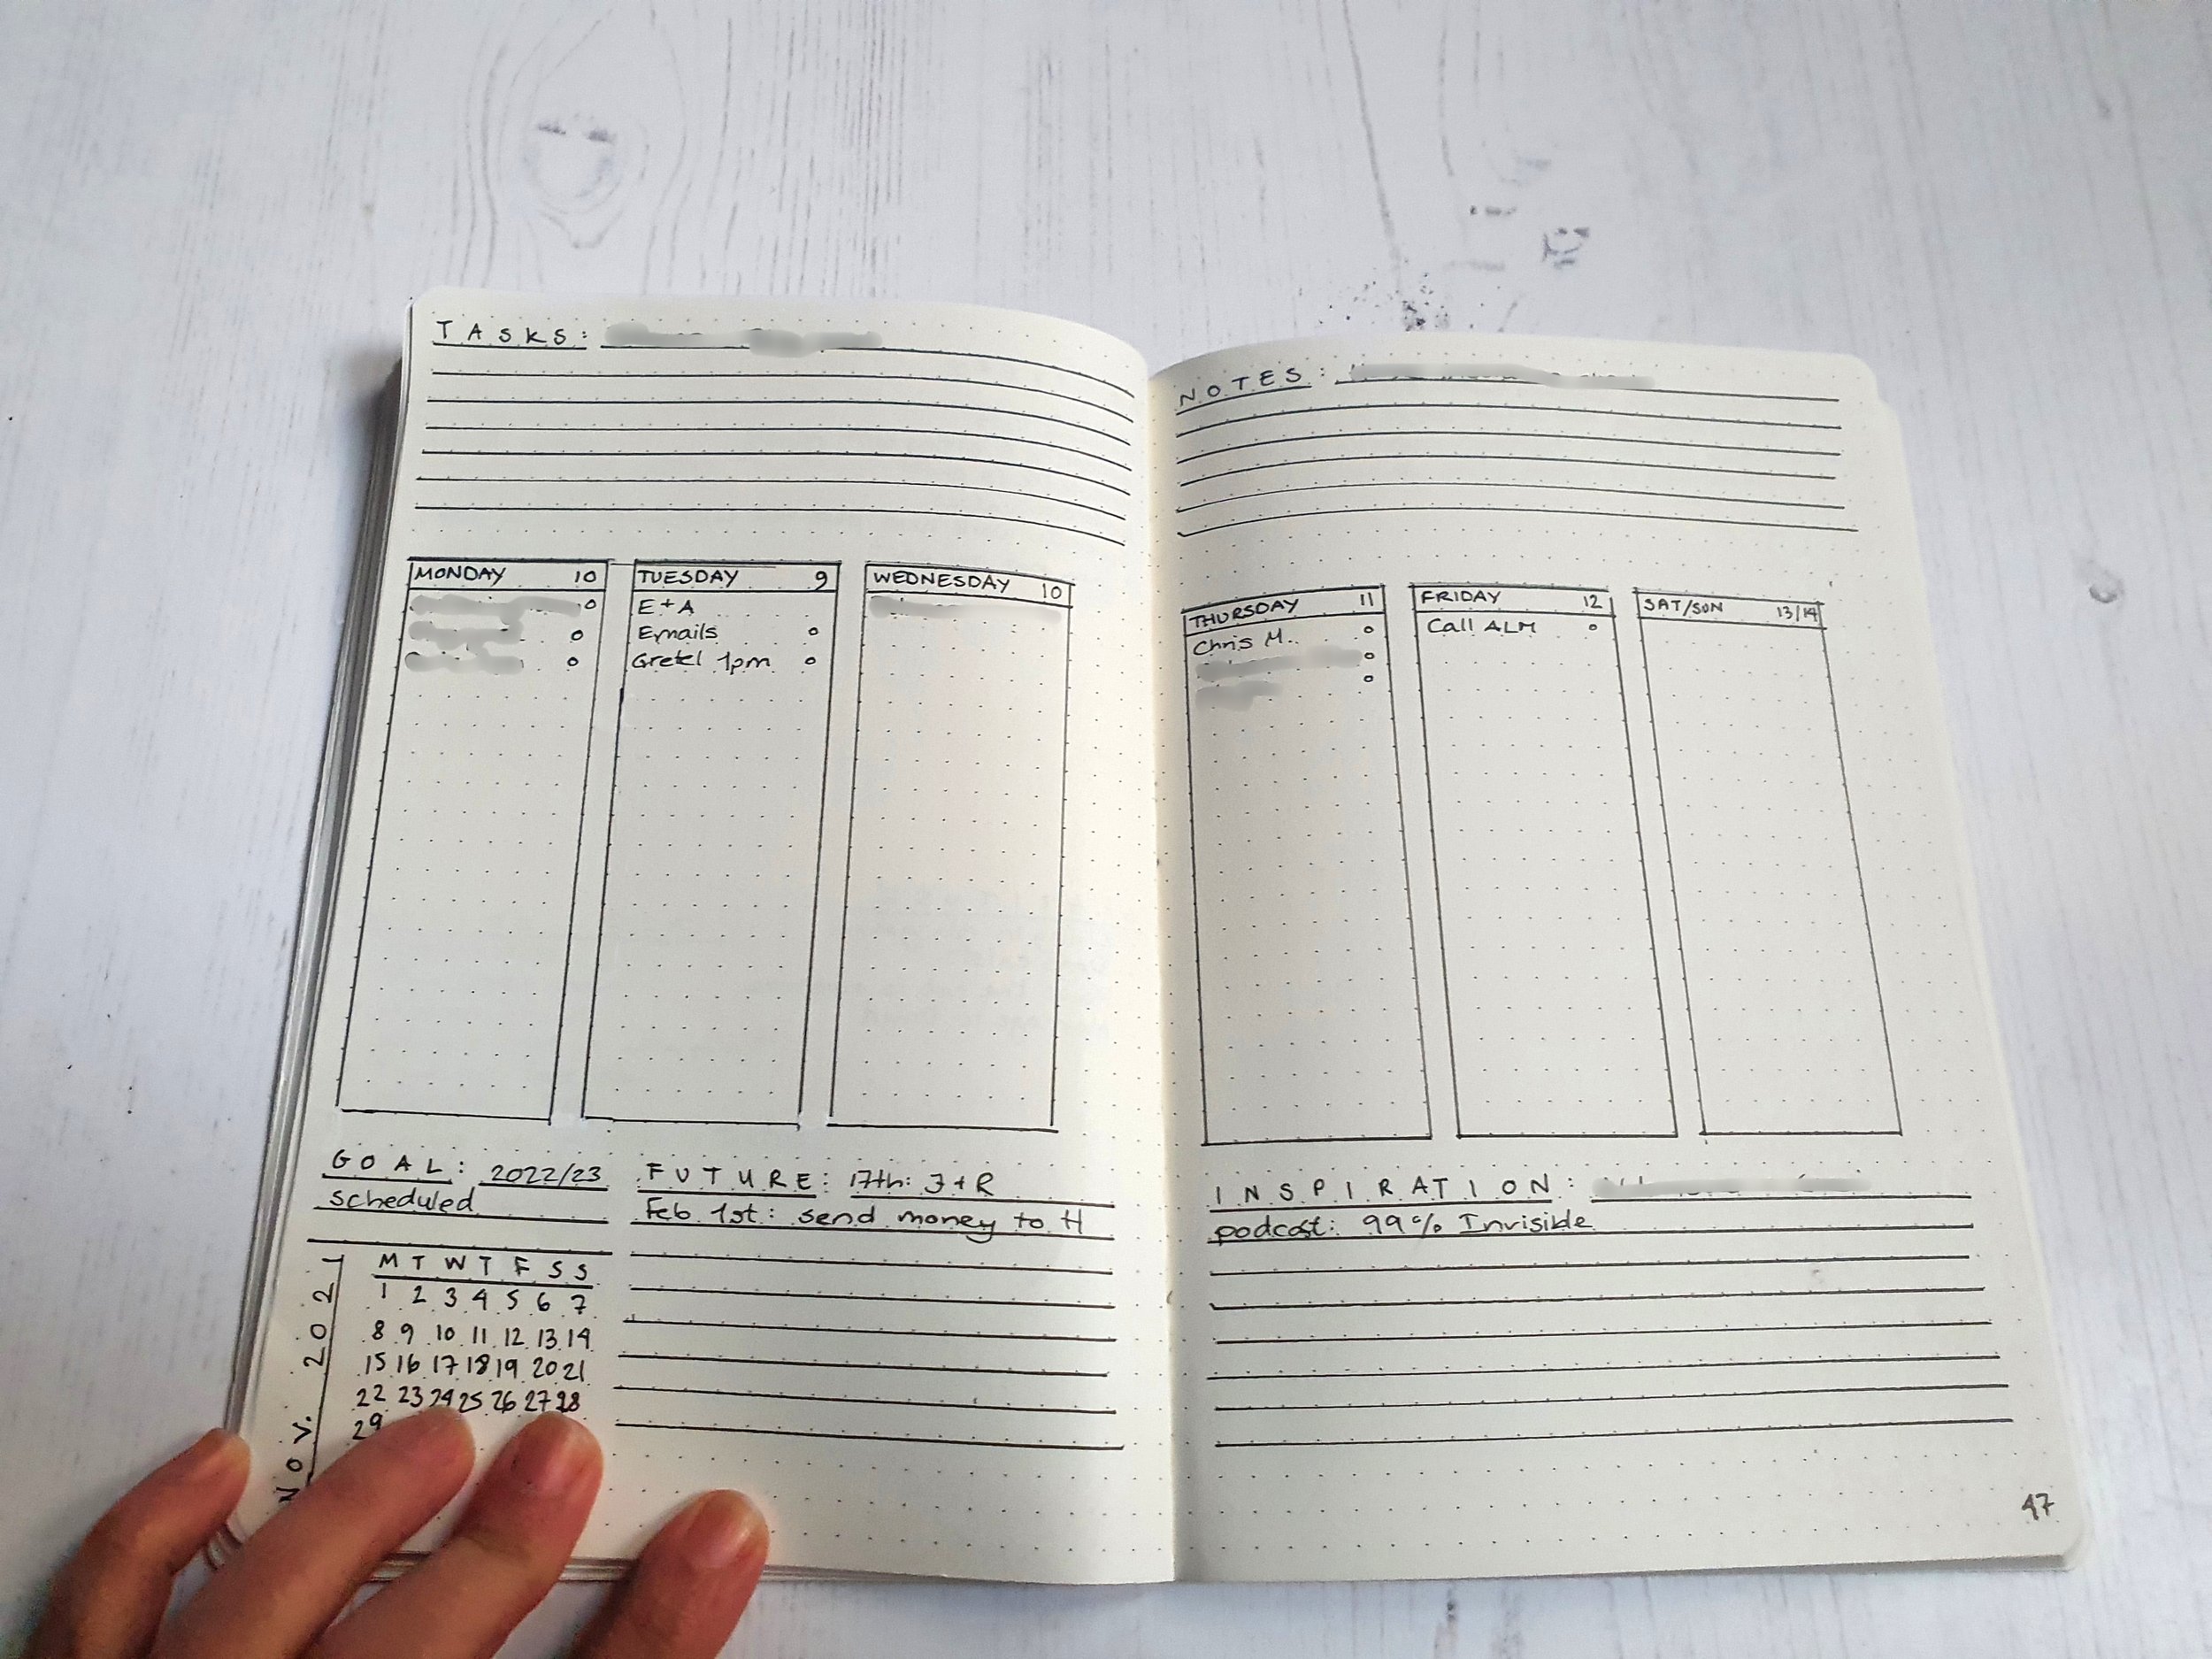
Now for the “wish list” page which is one that I use to figure out what I should be spending my time doing! You might think of it as a matrix.

I have three boxes: Want, Need, and Making - and then a fourth box that contains my current stash obsessions.

The things I want are not necessarily the things I need, and vice versa. You can see that I need two cosy trousers for the Scottish winter, but I want a cropped navy sweater. Those things are not the same, so some decisions need to be made. I also have my stash that reveals I do indeed have the perfect fabric for some navy cord culottes - so that project is moved into my Making box.

I constantly refer to the Want and Need boxes to figure out what should be next on my making list, and it’s especially helpful if I already have the materials in my stash. Rather than having one page of just Wants or Needs and my stash notes elsewhere, I can jump back and forth to balance my making plans.

Next week I’ll share more details from how I make the leap from Want, Need, Stash to the actual Making part, and I’ll share more spreads (including one of an actual project page).

Hope you found this interesting and maybe something that helps you in your own making journey!

Are You Okay?

Mental health is something people find difficult to talk about, although it is getting better. When I mention that I am currently in therapy, people will ask me in a very gentle voice: are you okay? And I have to reassure them that I am actually okay. Therapy is making me a lot better than I’ve been my entire life. My husband tells me that I am less brittle than before and my friends tell me there is a calmness about me that I didn’t have before. Being in therapy does not mean I am broken, but rather that I am learning to be kind to myself and strong.

I might as well tell you some of the reasons why I sought therapy. Since I was seventeen, I have been living with depression and anxiety. Some years have been relatively good, other years have been a struggle. The good years were calm years; years where I could exist quietly and enjoy the simple things in life. The bad years were the dramatic ones: falling ill, graduating university, moving to Scotland, losing a close relative, and even being busy with work. The more I pushed myself, the worse I felt.

And so this year I decided to do something about it all. Rather than carry on and putting band-aids on whatever wound I was carrying, it was time to clear out the wound and figure out how to live. This is the best decision I have ever made. I am actually okay now. Therapy is making me a lot better than I’ve been my entire life.

If my family had been religious, you might have said that I grew up in a cult or a sect. We lived quite remotely, and my social life was strictly monitored. I wasn’t allowed friends in the local town nor was I allowed to participate in any after-school activities. I was fifteen until I was allowed to choose my own clothes, and even then some clothes would “disappear” from my closet because they weren’t proper. My beloved dog disappeared too without me being able to say goodbye. These “disappearing acts” would continue well into my twenties long after I had left home. Food was regulated too and was often the source of much strife. Once someone served a pizza as a family meal, and the fall-out could be felt for weeks. I spent most of my early life being as unobtrusive and pliant as possible, trying to follow the rules as best I could, though they would often change overnight.

But it was also an incredibly creative family. Uncles played in a band or painted murals; others took up oil painting or lithography. The women in my family were exceptionally talented with their hands: I learned to dress-make, knit, crochet, cross-stitch, cook from scratch, fillet a fish, and make jam - all before I turned nine. All my life I have chosen to focus on the positive aspects of my upbringing rather than the negative ones. I filtered out all the neglect and abuse, and tried to tell myself that all these people were interesting and complex rather than dwell on what they did to both me and other family members.

And some of them did very awful things.

When I left home and met people outside of my family, I learned that there were other ways of living. I did not have to ask for permission before going to see a film or buying a pair of jeans. Families could actually enjoy spending time together and not be locked in a constant battle for power (sometimes over as something as mundane as who got the best cardboard boxes out of the local supermarket). I found friends who became my Chosen Family (and I still love these people to bits). Looking back, my family expected me to return to the fold after I graduated. I did not, and my decision to stay in Copenhagen filled me with guilt. I continued to be drawn into family strife (allegiances would forever shift; I was not allowed to paint my own kitchen; things would always disappear; I had to be nice to family members whose presence made me nauseous).

And then I fell in love with David and moved to Scotland.

I have spent the last six months piecing together what happened to me growing up. The brain has an ability to shelter us from trauma and there are memories I’ll never be able to access (oh wow, I’m grateful for that because I know exactly what those memories are about). And I am really, really okay now. I look at the face of young Karie, and I wish I could have told her that she’d grow up to be a remarkably strong young woman; that she would escape all the terrible things; and that she’d end up happy in a far away country. I’ve read books about dysfunctional families, cult survivors, and various psychological conditions with which family members have now been diagnosed. I have learned so much and I have done a lot of hard work on myself. It’s been all-consuming at times, but this has been a lifetime in the making.

Speaking of making, I was worried for a long time that I would not be able to come back to Making Stuff because my earliest memories are so intertwined with my family background. Could I ever enjoy knitting or cooking again? After several months of therapy, I finally began to realise that Making Stuff is an integral part of who I am and that I have always used it to express myself. It has nothing to do with who taught me my skills.

Are you okay? Yes. Yes, I really am. For the first time in my life.

Making It Work: Using A Minimal Bullet Journal As A Tool

Recently I mentioned on social media that I am a new convert to bullet journaling. My bullet journal keeps me organised, focused, and productive which is no mean feat. I am a one-woman business and as a result I have a long to-do list every day. I have tried a lot of things: wall planners, digital calendar reminders, traditional planners, and dozens of notebooks. The bullet journal is the best tool I have found, and I am deeply in love.

Let’s start with the basics: the bullet journal is an analogue method devised by NY-based designer Ryder Carroll. It’s a system for “tracking the past, organising the present, and planning for the future”. Here’s a short youtube video by Carroll himself if you want to know more about his ideas. You add pages according to your needs: someone might want to track their gains at the gym, while others want to keep track of their coffee purchases; some might need to co-ordinate school runs, while others need to outline study plans. It’s all individual and and it’s infinitely customisable.

Some want to use colours, stickers, washi tape or change their monthly layouts. I have opted to keep my bullet journal completely clean and sleek. I use a dotted A5 notebook and a black fine liner. My bullet journal is very minimal compared to most bujos you see on Instagram. This may come as a surprise because I am a creative person - but for me, the bullet journal is not a creative exercise in itself; the bullet journal is what makes me have time to be creative!

Here is what I do.

I used one page for the monthly log. Each day is marked with a letter (for the day of the week) and the date.

The monthly log is used for birthday reminders, the major tasks (like deadlines or teaching appointments), and social events. I have to pace myself with my social events, so it is really useful to see if I have to be social three days in a row or not! The monthly log is also great for establishing habits like going for a swim every Monday and Wednesday! On the right-hand side of the page, I log my major tasks and goals. At the bottom I have just enough space to add a few notes.

On the other side of the spread, I keep my trackers. I have trackers for eating-out (incl. coffee purchases!), reading, creativity, exercise, writing, and mental health check-ins. The trackers are not a tool for punishing myself (you haven’t exercised today!); they are a tool of kindness. For example, if I start feeling lethargic I can see that maybe I skipped out on my daily exercise for a few days. Aha!

The next spread I use sparingly, but it’s really good for keeping myself on track. The Brain Dump on the left-hand page is divided into two sections: work and personal. The work brain dump is used for thoughts I have about my work. It’s a space for clarification and reflection. At the end of each month I look back and see things are clearer or not. When I decided to retire from teaching face-to-face, that decision was made from thoughts I had jotted down in this section! The personal brain dump is used in the same way.

The right-hand side is a monthly check-in that draws upon what I’ve done in the previous sections. How am I feeling? Is that left knee still messing me up? It’s great for long-term evaluation of my general health. If I have to see a doctor, I can refer to my check-ins to see when I last had a cold or if I felt sadder during a specific time.

This spread I use a lot more (the photos are taken at the start of the month, so this spread will be full by the end of the month!).

The left-hand page is all about Making Stuff. I’m a creative person and I like to make stuff, both as part of work and in my personal life.

At the top, I have a list of all my works-in-progress: this both reminds me not to take on too many new things and also what things I am currently working on. My brain likes to forget that I already have a shawl on my needles, so I might cast on for another. I really like having this list in plain view.

And then I have a section with Making Ideas. The Making Ideas section is where the bullet journal really works for me as a tool. I have so many ideas and I needed a way to sift through them. This particular list is under the Monthly Log section. I have a corresponding page in my Weekly Log section (further on), and I jot down every single idea down in the Weekly one. As I move through the month, if an idea keeps popping up, then I transfer it to this Monthly Log section. I still log every single idea, but I can see which ideas feel substantial.

On the right-hand side, I have something which I might not need in the future, but which feels very relevant right now (did I mention I love how easy it is to customise a bullet journal?). I have a Recovery log and a Gratitude log. I am currently in trauma therapy, and the bullet journal lets me document my recovery. I also jot down tiny, good things under Gratitude. It is a great mental health tool, and one that would be easy to make into a full-page spread if I should need it.

My Weekly Log looks like this. This is the one spread that keeps me going throughout the week.

I have divided the spread into 6 columns - one for each day (Saturday/Sunday together). I’ll add tasks, events, and reminders as I need. Each day has a max of three major tasks or events, and then as many to-do tasks as I can manage. I cross out when I’m done with a task, and if I don’t manage to do it, I’ll move a given task to the next day. It’s really satisfying to see tasks move about and being “conquered.” It also let’s me see what’s feasible to do within a week, and I don’t take on too many tasks.

Something I really, really like about this spread: the tasks, goals, notes, future, and inspiration sections.

I fill out the Tasks at the start of the week, and then allocate them into the days. Goal is for keeping me focused. Future is a big picture reminder of things to come, events to prepare, and has a weird synergy with Goals for me. The Notes section is whatever pops up: a reminder to buy lightbulbs or maybe an address I need to use that week. Finally, Inspiration is a great little section. I add podcast recommendations there as well as mysterious notes to myself about awesome stuff I’ve seen or read.

This is what the spread looks like after I’ve begun filling it out. Over the week, this will be full of valuable information, productivity, and records of what I’ve been doing. It’s just one spread, but it works wonderfully well for me.

Now, I do have more pages set-up following the weekly spread, but they are the same basic set-up as the Monthly Log spreads. I have already mentioned the Making Ideas page that I set up weekly to catch all my ideas, but I also have a Quoted spread where I note down quotes from what I’m reading or hearing. I keep track of films, TV, and podcasts I listened to or watch. I might have a specific task that my therapist requires me to do, or I’m working out a specific knotty problem with my writing. They get pages too under my Weekly log.

A caveat: I do have two other journals. I have a reading journal where I log the books I read (currently at 87 books this years!). I also have a work-specific journal for my designing which contains sketches, hand-drawn charts, pattern notes, maths problems, and notes on yarn stash. Again, there’s synergy there between the Making sections in my main journal and the design journal: I can see the inklings of ideas starting in my bullet journal, I work out the practicalities in my design journal, and then later in the process I see the projects come back into my bullet journal as to-do tasks. It’s great.

There you have it. I’m a complete convert to bullet journaling, and it’s such a great tool that requires very little effort or skill to set up.

MATERIALS:

  • Pens: I use either Pentel Ultra Fine Liner S570 or Sakura Pigma Micron 03 - both in black

  • Journals: I use three different ones. Stationery Island A5 Dotted Notebook (reading), Moleskin A5 Squared Notebook (design), and Leuchtturm 1917 A5 Dotted Notebook (bullet journal).

Change Is Always Positive

People can often be afraid of change; it feels scary or upsetting. I tend to view change as something positive, and it is with this mindset that I post this blog entry.

Hello.

Right now the cherry tree outside my kitchen windows is changing from green to the most delicate red you can imagine. The tree is forever adapting to changes in temperature and available sunlight. Looking at the cherry tree is cheering, whether it is the lovely cherry blossoms in spring or the beautiful autumnal leaves. I even find it cheering in the depths of winter as the bare branches stretch towards the sky with promise.

The tree reminds me that change is inevitable and that if we prepare and adapt, change is always positive.

I have spent the last many months going through intensive trauma therapy as I have come to terms with some awfully dark things that happened to me as a child and young adult. You don’t need to know the details, but trauma therapy has been very hard and also very good. I have realised the depths of my trauma as well as recognised the well of resilience inside me. All the terrible things which happened to me do not define me, and I am so very proud of the life I have today.

Working through things with an excellent therapist has made me realise that I need to make some changes to my life. Change is always a positive if you come prepared.

This year marks 12 years since I began working in the knitting industry. I have been self-employed for the past seven years, and I have mostly learned how to be self-employed by being self-employed. This has been fun, but also stressful and occasionally incredibly unhelpful. 

So, let's embrace change and make things better. 

The biggest (and scariest change!) is that I am retiring from teaching at yarn shows and yarn shops. This is not a step I take lightly as I absolutely love teaching. Nothing beats seeing lightbulbs over students' heads and watching clever knitters gleefully take on new challenges. However, teaching comes with travel, and travel is very, very physically challenging for me.

Online classes will resume, but in a limited capacity (and Patreon supporters will be the first to know). I'm trying to figure out how much teaching I can do within my abilities, so watch this space. Occasionally I may pop up as a guest teacher/lecturer on a knitting tour; however, I will no longer be leading those. 

Limiting my teaching is one of the hardest decisions I've ever had to make, but needing to spend less time recovering after travel means more time for the good stuff!

I'm also cutting out a lot of clutter. Most of this will not be visible to you, but I have been doing much 'behind the scenes' stuff like technical writing, copy editing, consulting, and mentoring. While many of these things are intellectually stimulating, they can also be draining or distracting. However, many of you have told me that you would like to see me do more writing, and I was so thankful to hear this as I had already decided to spend more time writing (and some of my more esoteric classes will become essays/book chapters in due course). I'll continue to write on Patreon as well as in other contexts.

What gives your life purpose? Those were the words of my therapist the other day, and I had to take a moment to reflect. In many ways, the important things in life are the things I did not get as a child. Having agency, the right to a voice, and the freedom to express yourself are three things I value both in my personal life and in my work.

My work is all about empowerment. I want you to become the best storyteller of your life that you can possibly be. I want you to make beautiful things that matter to you. I want you to have a voice through the medium of your choosing. And going forward, that is going to be my focus.

Designing items that reflect your right to speak up and have a voice is a gift to myself as much as it is a gift to you. Whenever I publish a pattern, it belongs to you as much as it belongs to me. You can change the colours, the length of the sleeves, twist the cable the other way, or even turn the cowl into a hat. If I write something that resonates with you, I want you to own your reaction and use it for good. 

And finally, never underestimate the power of making. I became a maker as a child - both because I grew up in a very creative family but also because it let me express myself when I felt I had no other outlet. Making is an act of rebellion and creation. You make something exist in the world, creating something out of seemingly nothing. Whether you struggle with depression or you are working a job you loathe, making something is an incredible feat. Baking a cake, cooking a meal, planting a garden, drawing doodles .. every act of making stuff is incredibly powerful.

Going forward, I will be making changes slowly. I will try to make decisions thoughtfully and consciously, because I need to place them within what I've learned over the last few months. 

I hope to have your full support (and your support over the last few months has been truly immeasurable) no matter what the future holds. It will look a bit like that cherry tree, I think: leaves changing colours, adapting and flourishing.

Change is always positive.

So, You Want a 4ply Yarn for Colourwork, Huh?

20210429_145844.jpg

Earlier this month I was asked to compile a list of 4-ply/fingering-weight yarns available in the UK and suitable for colourwork. I asked my Twitter followers for their favourite yarns, and the resulting thread was so wonderful that I decided to share the tips with you.

Designing and knitting colourwork will always be something I love doing. Colour combinations are endless and it is so satisfying to see a colourwork stitch pattern begin to form. While it may look daunting to beginners, colourwork knitting has its own logic and rhythm to it. Through my years of teaching colourwork, I’ve learned that finding the right yarns is key to a successful project.

So, here is a list of some of the excellent yarns you can use if you are a UK-based knitter (or if you want to use a British yarn).

The Classics:

Jamieson’s of Shetland and Jamieson & Smith are the two classic Fair Isle yarns. The two companies both sell genuine Shetland yarn in a myriad of colours.

One of Scotland’s best kept secrets is JC Rennie whose yarns include both a Shetland-like 4ply and a Supersoft Lambswool 4ply. You might have seen the Lambswool 4ply sold under other labels, but the full colour range is available from Rennie. Wee County Yarns sell 10g mini-balls of Rennie which allows you to combine a lot of colours without committing to full balls.

John Arbon is always incredibly popular at shows and it is easy to see why when you look at their range of yarns. Knit By Numbers 4ply comes in 100+ colours and the set-up makes it easy to choose and mix colours across the whole range. Their Exmoor Sock 4ply is a classic sock yarn that comes in 13 colours that all work well with each other.

Garthenor in Wales has several 4 ply yarns perfect for colourwork. Their Preseli comes in a stunning array of colours while their Number 2 is all about natural sheep colours.

Designer-Led Yarns:

Marie Wallin has developed her own British Breeds Yarn which comes in an array of beautifully heathered colours. Marie used to be Head Designer at Rowan Yarns and her eye for colour continues to be classic and subtle.

Another designer with a strong sense of colour is Susan Crawford whose Excelana 4ply is influenced by Susan’s love of vintage fashion. Excelana has a nice grip which makes it excellent for colourwork.

The name Alice Starmore is synonymous with incredible colourwork designs and it’s no wonder she has her own yarn. Starmore’s Hebridean 2-ply is a beautiful yarn available in painterly colours.

And Milarrochy Tweed from Kate Davies is another design-led yarn with a beautiful palette. The addition of mohair to the fibre blend gives it a subtle halo as well as good grip.

Yarn Shops’ Own Yarns:

Looking beyond designers with their own yarns, let’s look at yarn shops. Two yarn shops that popped up in the comments were Wensleydale Longwool Sheep Shop which has developed their own 4ply yarn (which comes in 25g balls - perfect for projects where you need plenty of colours, but only a small amount of each) and Baa Ram Ewe whose Pip Colourwork also comes in handy 25g balls and has proven popular.

Indie Dyers:

British indie dyers are also dyeing yarns perfect for colourwork and many offer miniballs or small set-ups too.

Gathered Sheep Yarns dyes gorgeously sheepy yarn in deep, autumnal colours. Giddy Aunt Yarns goes for a clear, saturated colour range.

One of my favourite yarns is Kettle Yarn’s Baskerville 4ply which comes in a beautiful set of colours which reminds me of stones or minerals. Baskerville is a Gotland/BFL mix which makes for a nice, toothy yarn. Their Northiam 4ply is pure BFL and slightly loftier with strong, confident colours.

In Wales, Triskelion Yarns dyes a beautiful Corridale 4ply in their signature semi-solid colours.

Another of my favourite dyers is RiverKnits whose science background is evident is how she works with colours. Severn 4ply is a woollen-spun 4 ply weight yarn with a warm, woolly handle thanks to the Jacob fleeces used in producing the yarn.

The delightful Bluebell Yarns have a host of 4-ply breed specific bases. I have my eye on the Falkland/Corridale base for colourwork purposes.

Meanwhile, Marina Skua’s hand-dyed Mendip 4ply showcases a truly wonderful colour range (some of those oranges and yellows are on my mind) and the base is a sourced Shetland-cross.

Small Flock/Farm:

Whistlebare produces yarns from their own flocks and their Cuthbert’s Sock 4ply has a satisfying crunch to it. At time of writing they were waiting for the new Spring 2021 spinning to drop.

One yarn I keep wanting to try is Uradale Yarns’ natural Shetland 4ply. You can also buy organically dyed yarn from them, but my eyes keep being drawn to the natural sheep shades. They are stunning.

And The Grey Sheep Co. also has a lovely selection of 4ply yarns. They comes in both full skeins and mini-sets. The colour palette is muted with a slight hint of variegation.

Black Isle Yarns from the Scottish Highlands has a very fine sportweight that I’m assured leans into 4ply category: Auchen. And The Birlinn Yarn Company from the Outer Hebrides makes an exquisite 4ply that is inspired by the incredible landscape around them.

One of my favourite yarns is Cartref DK and it thankfully also comes in a heavy 4ply. It is a pure Welsh yarn: Welsh sheep and spun/dyed in Wales by careful specialists.

Doulton Border Leicester is a no-kill farm focusing on a rare sheep breed. Their 4ply yarn comes in 27 jewel-like colours and is smooth to work with.

These are the yarns I’ve compiled thanks to my own experiences and also Twitter suggestions. I have left out most commercial yarns or any imported yarns (although there are plenty of those available in the UK too and many are excellent). I urge you to keep exploring yarns and have fun along the way!

- Karie

Catterline Sweater

catterline2_ig.JPG

Some years ago the kind folks at Welsh yarn company Cartref sent me a small parcel with their brand-new yarn produced entirely in Wales. Cartref means “home” in Welsh and they had set out to create a yarn that embodied Wales. I made a swatch with the yarn and fell in love with its bouncy, yet robust mix of Welsh Mule and Welsh BFL. And now I’ve designed a sweater that feels like home too.

Catterline (shop link) is inspired by the relaxed pullovers worn by artist Joan Eardley whilst painting in the Scottish fishing village of Catterline. The chevron stitch pattern mimics the brushstrokes Eardley used to depict the fierce winds and waves of her adopted home, and I chose to work Catterline (ravelry link) in the most glorious golden colour in honour of the hues Eardley used to depict the fields around the fishing village. Eardley is one of my favourite artists and I’ve long wanted to design something in her honour (I launched a series of patterns called Authors and Artists back in 2015 - that is how long this idea has been sitting with me).

catterline.jpg

So, let’s look at this sweater which I have lived in ever since I finished it.

I have expanded my size range, so this sweater is graded in 11 sizes running from 30” to 60” busts. It is designed to be worn with 15-20cm/6-8" of ease, but you can play around with the fit as you like. If you’d like a slightly more fitted look, you’d knit it with less ease and vice versa. I always thought an oversized fit would look odd on my full-bust figure, but I have really leaned into the relaxed silhouette and find it is so versatile with both dresses and jeans. Plus you can add layers underneath for really cold days.

When I first began sketching Catterline, I knew I wanted a cropped sweater. I am quite short-waisted, so I also knew that I had to be careful with measurements: one woman’s cropped sweater is another woman’s bandeau! I have added instructions on how to add length and also a very detailed schematic/sizing table to help you figure out the perfect measurements for yourself.

Does it all sound daunting? It is not.

Fitting a garment is all about knowing your own measurements. If it makes it easier, I am wearing the size XL1 with around 6” of positive ease. The type of sweater is less about finding a size that fits all of your measurements, and more about what kind of fit you’d find comfortable.

I’m a big fan of comfort.

catterline7_ig.JPG

In an ideal world we would have gone to Catterline to shoot the photos. It is not far from the fishing village where Dave grew up, and we have many friends in the area. Unfortunately, travel was not possible (and continues to be impossible). Joan Eardley studied at the Glasgow School of Art, and some of her most well-known paintings depicted Glasgow children, so we thought we’d find somewhere suitable. We ended up falling in love with a little nook near Glasgow’s Riverside Museum - the colour combination of the grey metal, the beige birch trees, and the golden leaves felt like an Eardley painting come to life. My hair added the little zing you find so often in Eardley’s paintings.

We also took the opportunity to shoot some seated photos. Over the years I have become less mobile and more reliant upon mobile aids. Instead of ignoring that in our photos, we have decided to embrace my reality and share it with you. Besides, it’s nice to see what a garment looks like when we sit down!

My thanks to Dave Fraser for the photography and the schematics (and for introducing me to Eardley’s art all those years ago).