Making Landscapes

Dorothea the Sheep, in a field outside Lyngby, Denmark

Dorothea the Sheep, in a field outside Lyngby, Denmark

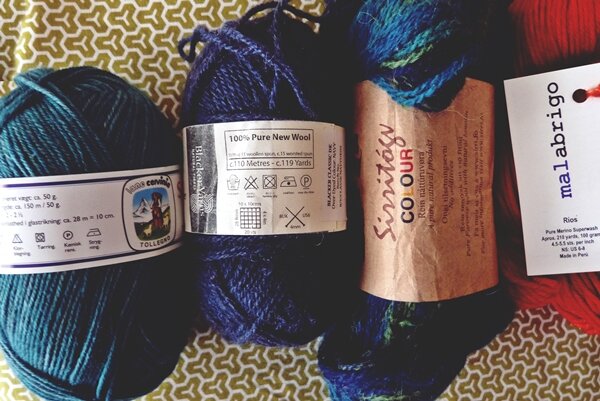
I miss walking through landscapes. I miss seeing sheep dotted on hillsides, a reminder of where our wool comes from. I miss making memories by buying yarn on my travels. I miss meeting fellow knitters and coming away with inspiration. 

Instead I make things at home and dream through my hands as they manipulates stitches and yarn. 

So, I have an announcement because I know I am not the only one feeling like this. 

Please join me for a series of conversations and workshops that I'll be hosting via Zoom over the next few months. I want to connect you with those hillsides, with those landscapes, those people. I call these Making Connections and I hope you can make it (no pun intended!). 

The first conversation will take place on November 19, 2020 at 6pm GMT. I've invited author and knitter Esther Rutter to join me in a conversation about creating imaginative spaces and travelling through woolly landscapes. 

I am sure you all know Esther Rutter already. She is the author of This Golden Fleece: A Journey Through Britain's Knitted History. Her book tells the story of the knitted heritage of the British Isles and is full of fascinating histories of communities whose lives were shaped by wool. From the mill workers of the Border countries, to the English market towns built on profits of the wool trade, tradition and innovation have always intermingled in knitwear industries.

Esther and I share a fascination with how we engage with landscapes and how much knitting is shaped by both our inner and outer landscapes. How many of us end up buying yarn and patterns to remind us of specific places and times — and when we wear our makes, we are reminded of where we were when we made them. 

You can buy a ticket to the In Conversation With Esther Rutter: Making Landscapes via EventBrite. Tickets are £6 each.

The view from the headquarters of Alafoss Yarn Company just outside Mosfellsbær, Iceland.

The view from the headquarters of Alafoss Yarn Company just outside Mosfellsbær, Iceland.

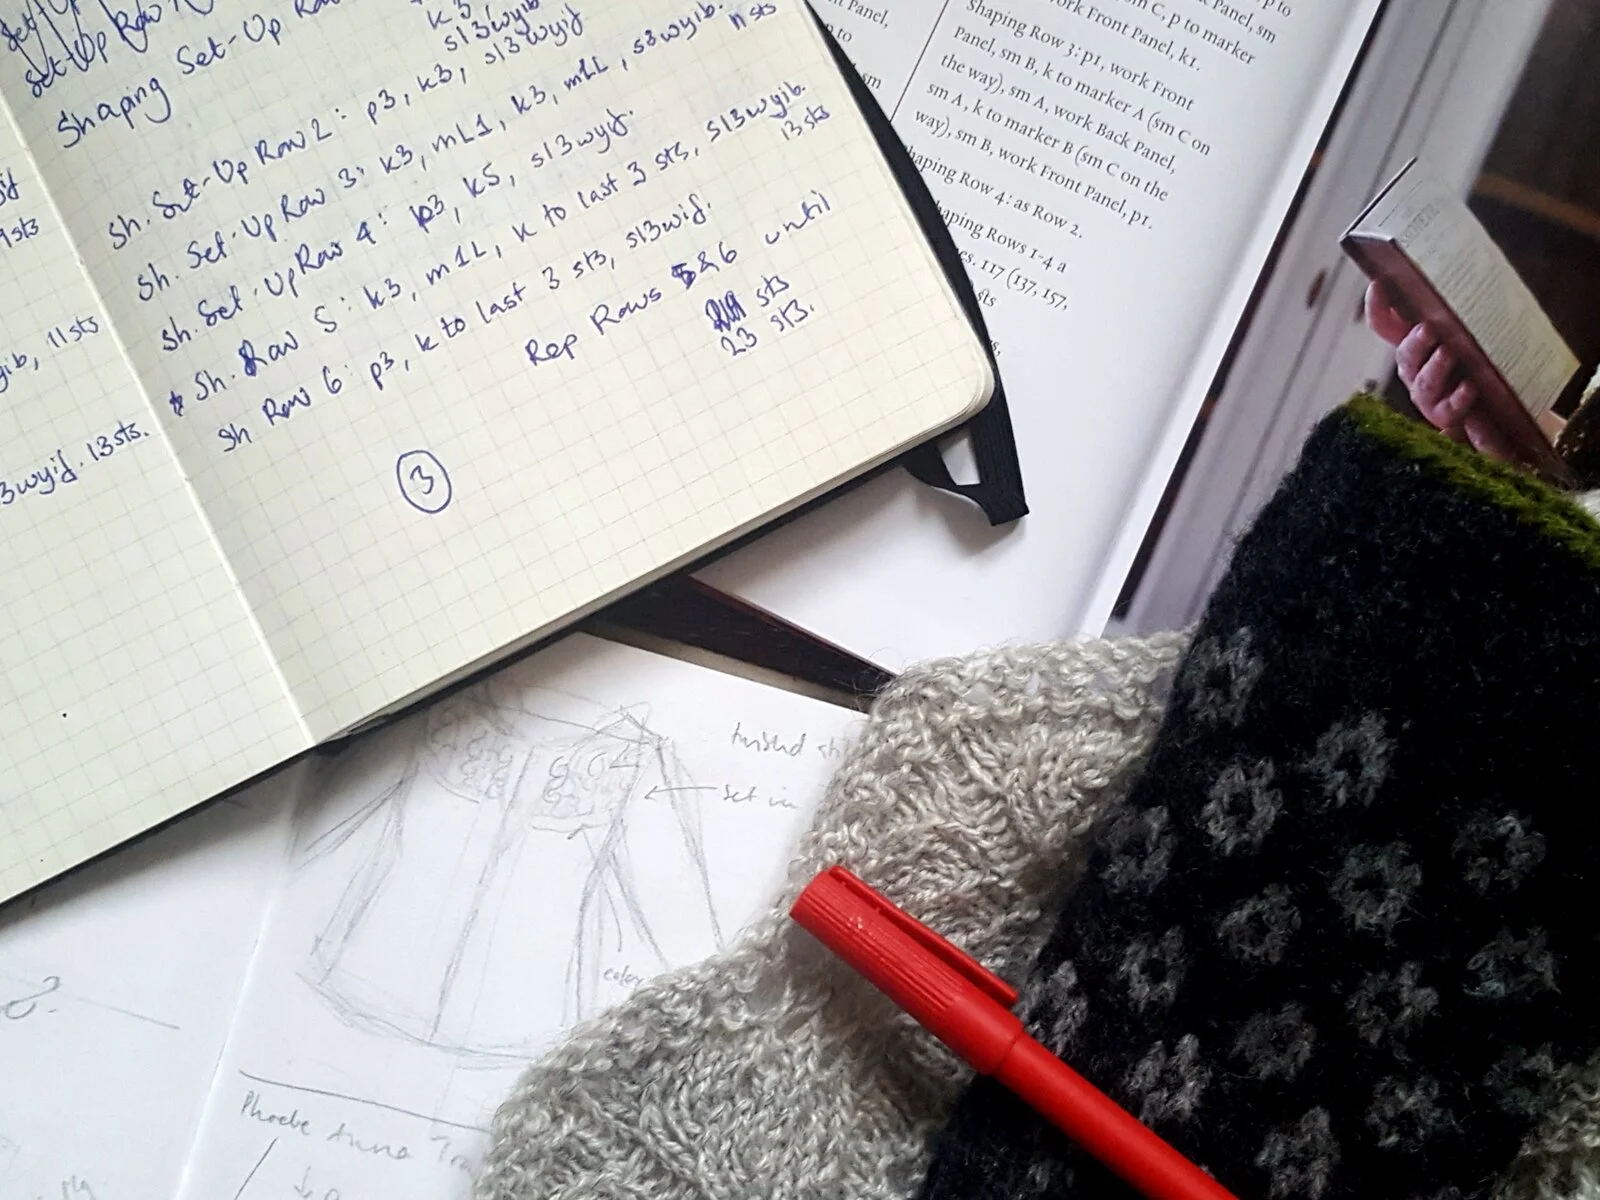
The second announcement is one that I know many of you have been requesting for a very long time. I'm going to teach a series of workshops online, starting with my signature Knitting the Landscape class. Moreover, I am going to run these workshops, so they are available/suitable to several time-zones. 

Knitting the Landscape is a workshop with a difference. You don't have any homework and it does not centre upon a specific skill. Taking cues from psychogeography, a method for exploring everyday landscapes, this workshop asks: what is the fabric of your own everyday life? Together we will investigate what knitting means to you and how knitting can be used a creative exploration tool. From fields and mountains to concrete high-rises, Knitting the Landscape is a way to connect with not just places you have been but also knitting itself. 

It's a class that means a great deal to me, and I am so excited that I can finally offer to people regardless of geography! That in itself gives a certain sense of frisson to me! We'll be talking map-making, cartography, and geography .. but without the actual constraints of where we live!

So far I am offering this class twice: 

Saturday, November 21, 2020 at 10am GMT/ 11am CET/ 9pm AEDT

Saturday, December 5, 2020 at 9pm GMT/10pm CET/ 2pm PDT/5pm EDT

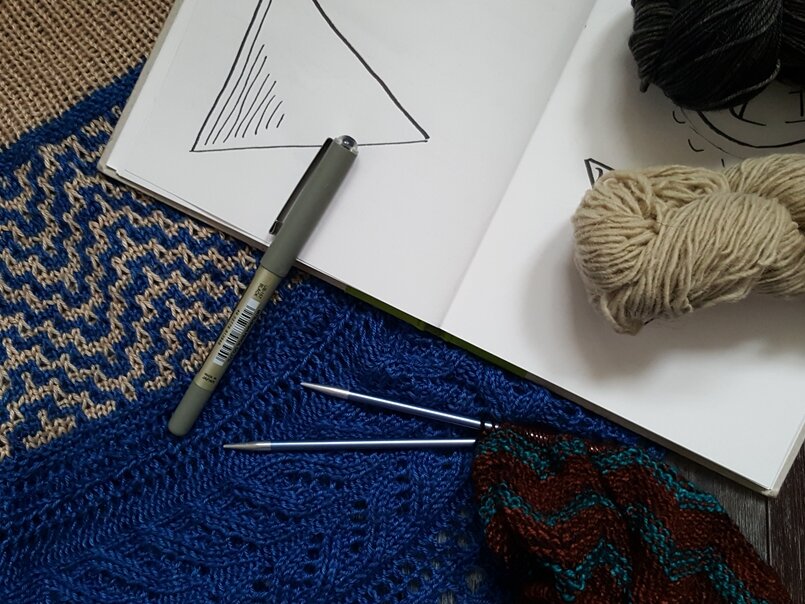
Knitting the Landscape is suitable for beginner knitters and up: if you can cast on, knit, purl and cast off, you can do this class! Materials: grab a heap of scraps and some suitable needles. You also need pen/paper and an open mind.

Due to the nature of this class, tickets are very limited and are priced at £45 each

A sheepy landscape..

A sheepy landscape..

I am incredibly excited about connecting with everybody despite the constraints we all live under at the moment. I am also very excited to bring you conversations with people who are truly inspirational in the way they approach making and crafts.

Five Things You Should Know as a Beginner Knitter

knitting6.jpg

Sometimes the internet is very good at throwing a lot of information at us and it can get really overwhelming. What do you really, really need to know when you first begin to knit? Obviously you need to know how to cast on and how to work a knit stitch. The rest is just sprinkling on the top of your ice cream Sundae, right? Maybe. Here are five things I wish I had known when I first started knitting.

1. Use colours that you like.

When you first start knitting, you’ll probably pick up some bargain yarn or get some yarn from a friend’s yarn box. You don’t want to invest too much in supplies — because you feel like you might just mess things up or you might not enjoy knitting.

Here’s a tip: if you use a colour you like, you’ll enjoy your knitting far more than you if you have to stare at a colour you don’t really like.

If you use a colour of yarn you like, you are also more likely to use your finished item afterwards!

four-green-yarns-on-chopping-board-2062061.jpg

2. Don’t Spend Too Much Time on the Internet!

I know, I know. You are currently reading this blog post, so who am I to tell you to get off the internet? Here’s the thing: many well-meaning people can make a simple thing look really complicated and scary, so try not to do a deep dive before attempting something new.

Are you working a cable for the first time? Look up a simple tutorial and then try it out in your knitting. Don’t look for more tutorials or blog posts, because suddenly you’ll be looking at seven different ways of working a cable and it’ll seem scary.

Knitting is just one stitch at a time and if something goes a bit wonky, just take it back to where you know you were right and then try again. No need to look up three more videos. You got this.

April-2015-078.jpg

3. Learn To Love Your Ball Bands

That piece of paper around your ball of yarn? It contains all sorts of important information.

It suggests needle size and standard gauge (and those are really just suggestions!) but it also tells you what the yarn is made of, how much yarn you get in a ball and how to care for your finished item.

Most importantly, the ball band tells you about dye lots. The dye lot number is super-important! Make sure to always get all of your yarn in the same dye lot. The colour might look identical in the ball, but if you knit something in different dyelots, there will always be a subtle difference.

Spend that extra bit of time on checking for the dye lot and you’ll be spared a lot of potential heartbreak.

knitting3.jpg

4. Not Everything Will Be Perfect & That’s OK

One of the hardest things about being a knitter is accepting that you’ve spent a lot of time making something .. and you might not like it once it’s done. I always start a new project thinking it will be the best thing ever, but sometimes it just doesn’t work out like that.

Maybe the hat looks weird on your head. Maybe the colour wasn’t quite right. Maybe you hated the yarn so much whilst you were knitting that you hate the finished item. It’s okay, it happens, and it does suck.

Have a box where you keep these items. You might end up donating them, or gifting them (a friend might love that pink hat), or you might discover that six months down the line those crazy blue socks are actually really awesome.

assorted-color-yarns-2062069.jpg

5. Don’t Force It

Are you sitting there still stuck on a project six months after starting it and you are hating everything? That’s fine.

Sometimes we think we might like something and it turns out that something is not for us. Maybe knitting isn’t your thing. Maybe you’d be happier with crochet or embroidery or Minecraft or yoga. Different strokes for different people.

Just promise me that if you are hating a project, it might be that the project is wrong for you.

Knitting a garterstitch scarf is incredibly tedious and even the most patient knitters would rather chew their own hands off than make one. Maybe cast it off early and sew the narrowest ends together - that way you end up with a useful cowl and a empty needles!

Also, the yarn might be totally wrong for you. As beginners we are often drawn to yarn that looks fun in the ball: different textures and fun little effects woven through the yarn make it look like the project’s going to be super-fun too! Sadly often these yarns are hellish to work with and can kill a lot of desire to knit. Try another yarn.

But don’t force it. Knitting is supposed to be fun!

agriculture-animals-baby-blur-288621.jpg

What do you wish you had known as an entry-level knitter? What would you tell your past self?

Something About Recent Knitting Discussions

patternwriting.jpg

If you are active in the online knitting community — that is, if you have an Instagram or Twitter account — you will probably have noticed quite a few heated discussions recently about knitting patterns, yarn substitution, and the expectations of knitting designers.

These are not new discussions.

I’ve been around so long that I’m getting deja-vu: knitting patterns are too expensive, knitting designers are elitists, yarn costs too much, knitting patterns are getting worse and so forth. I have seen dozens of blog posts about the true cost of designing & writing a knitting patterns, and I’ve also read a dozen more posts about the art of yarn substitution.

But this week I did read something that stopped me in my tracks. A fellow designer and teacher posted the following on Instagram:

..one of the things that has saddened me [as a knitting teacher] over the years is seeing a shift away from knitters who want to take ownership of their craft..
— Patty Lyons

Patty is a highly respected industry figure and has been teaching for many years. In other words, when Patty highlights something, you better listen.

For many years, Elizabeth Zimmerman’s words about trusting yourself and be the master of your own knitting have been the mantra for knitters everywhere. All the knitting teachers I know try to impart that sense of trusting yourself in workshops. We urge you to believe in yourself and your abilities as we give you the tools you need to go further in your journey. We want you to ‘take ownership’ of your craft, so you leave a better and more confident crafter — and we certainly want you to continue to explore and have fun with your knitting.

When did we lose that? And why? Because I agree with Patty as my inbox continues to groan under questions that often can be answered with ‘yes’ and ‘trust yourself’ (though I do answer more fully, of course).

Questions about colour combinations are something so individual that while I can lend some guidance, it is ultimately something where knitters should not need my approval (trust yourself!). Yarn substitution questions are often so region-specific that I struggle to give a good reply (because I’m not that familiar with Australian yarns) and I can answer in general terms only (“a yarn that knits up at 22 sts over 4 inches and with good drape”).

Often the best answers I can give are questions in their own right: have you tried swatching? have you worked up a small sample in the colours you are considering? And often I’ve experienced that knitters prefer a clear-cut answer because they do not want to swatch or attempt to combine colours. They become impatient with me and sometimes a bit rude. And I want to shout: you lose out on so much knowledge by deferring to experts, teachers, and designers.

I think we live in a world of instant gratification. In the immortal words of Ariana Grande: “I see it, I like it, I want it, I got it”. It is so much easier to get someone else to approve your colours or yarn sub than to swatch, take a class or read a book. Yet the craft is losing a huge amount by leaving these decisions to a select few (myself included). By trusting in your own abilities, you become a better knitter. By taking ownership of your craft, you are not only gaining invaluable skills but you also help the craft develop and grow.

One of the things I find totally amusing by current discussions is the insistence that designers are gate-keeping and knitting teachers are keeping trade secrets to themselves. In reality we are doing the exact opposite. I want knitters everywhere to be confident and happy in their abilities. I want knitters everywhere to make informed decisions. I want knitters everywhere to create things that make them happy. And, to come back to Patty’s words: the best way to ensure all these things happen is for knitters to take ownership of their own craft.

PS. I’ve written extensively about where knitting is at and where we are going over on Patreon.

Material History: Making A Cotton Shirt

DSC_0269.JPG

I thought I’d share my latest makes with you before I continue with quite a serious topic. I have been using making as a way of therapy these past few months. I’ve mended blankets and pullovers, I’ve knitted, and I have been dress-making. This is the Willamette shirt from Hey June Handmade and I’ve made six of these shirts of the last month. It’s been intensely therapeutic to stick tiny needles into fabric and end up with something wearable. I squeezed this shirt out of 2 metres of handprinted Indian cotton and the result of one of those makes that feel intensely me.

But clothes do not happen in a vacuum and textiles are particularly important to this moment in time. The following post is an amended and abridged version of a piece I wrote for my Patreon followers (I discuss wool and linen in that post too).

So, let’s start by saying that cotton is not an innocent material.

Fashion_Plate_(Full_Dress_for_Decr._1798)_LACMA_M.86.266-horz.jpg

I grew up reading Regency romance (and I still love these books as a rule). One of my early favourites was Caroline Courtney's Love Triumphant in which country mouse Harriet is whisked away to London to keep her cousin Sophy out of trouble. In the book there is an enchanting scene in which Harriet and Sophy are taken fabric-shopping by Sophy's mother. They avoid the expensive boutiques and instead head to a fabric hall frequented by merchants. Here they coo over expensive silks (some scandalously smuggled from revolutionary France which dates the action to mid-1790s) but eventually decide to buy metres of cotton which is much cheaper and thankfully very much in fashion. 

There is a lot to unpack here. 

After centuries of elaborate dress, the upper echelon of society finally embraced simple dresses around the 1790s. Marie Antionette arguably started the trend when she set up our own pretend-farm and walked around in ‘peasant garb’ but the trend continued long after her death. It spread across Europe and penetrated most social classes.

Cotton fabric was incredibly cheap thanks to cotton plantations in the colonies which relied on slave labour. Plain white was a firm favourite at first as it was seen as a mark of gentility (let’s just take a moment here to ponder that statement in context of where and how the fabric was produced) and was also reminiscent of the Greco-Roman sculptures that were fashionable at the time. Yet soon block printed fabric became de rigeour for fashionable ladies. Block printing was a technique that was immensely popular in another colony, India, and white cotton was the perfect material for this practice.

In fact, block printed cotton fabric became so popular that by the 1810s other fabrics began to imitate it. 

A few years back I was lucky enough to have a private viewing of the collection of tapa cloth held by the University of Glasgow. Tapa cloth is not a woven material, but made from beaten barkcloth by Pacific island cultures, and it is beautifully decorated with stencils or stamps. Most of the collections held by Western museums today are the remnants of what European travellers brought home from their 18th and 19th century travels — often missionaries or merchants — but tapa is still produced today throughout the Pacific. You might enjoy this Living Heritage site which gives voice to contemporary tapa makers.

I was struck by a particular sample from Hawaii dating to around 1810. The design was unusual and unlike any other tapa I had seen. The curator explained the tapa (or kapa, to use the Hawaiian term) was made to imitate the then-fashionable block printed cotton fabrics made in India and the Caribbean. It struck me as one of the saddest things I had ever seen: here was an example of a fabric that was so beautiful and exquisite, yet its maker sought to distance themselves from their own culture by imitating a fabric so deeply embedded in brutal colonialism. 

Cotton is one material that I cannot separate from its troubled story and as protesters take to the streets in jeans and tshirts, I see history in the making in more than one sense of the word: I see the East India Company importing calico and linen undermining domestic cloth production in the 18th century, I see the Industrial Revolution fuelling cotton plantations in North America and the Caribbean, I see slave ships sailing across the Atlantic fattening the wallets of European merchants, I see the indigo dyeing which was a major slave plantation crop in North Carolina, I see textile factories in Bangladesh collapse upon their underpaid workers instruments as they worked to bring Westerners cheap clothes. 

And so nowadays when I read my Regency romances or watch yet another Austen adaptation, I think of where the cloth for the dresses came from and how its wearers could afford them. And when I make a shirt out of handprinted Indian cotton, I recognise the layers of history I am wearing.

Textiles are so embedded in all this wretched history and as we wear clothes or make clothes, I truly believe it is important to understand the context within which we are doing these things. Who are we and what do our choices say about us?

The Red Jumpsuit & Other Things

What a year 2020 has been so far. I hope you are safe and that your loved ones are okay.

I’m writing this after almost two months from self-isolation. I continue to work from home, but all of my teaching engagements are cancelled/postponed. This is a tough time to be self-employed. My good friend Woolly Wormhead has written a long post detailing how the ongoing pandemic is affecting her. It is a very good read, and her observation about how the pandemic affects those of us with inabilities and disabilities really hit home. Right now my Patreon is keeping me afloat and I cannot thank people enough for their ongoing support. It makes such a huge difference both financially and also creatively. Thank you.

During the past two months I have had plenty of time to think about making and the role it plays in my mental health well-being. I find that making things gives me a sense of agency at a time when I might feel I have little or none. It is not the first time I have felt this, but I feel it very strongly right now. Making grounds me in the here and now: I feel my hands working with materials, and I see patterns and textures emerge. It is easy to feel one day is bleeding into another (this is an excellent article about memories, time, and the pandemic) but I can measure out my life by the things I make.

Right now I’m making a navy jumpsuit and I am in the middle of a major mending project. I still knit, but knitting requires concentration and focus on another level as it is my job. On the days I cannot conjure up any focus, I mend and dress-make.

(Now that I cannot head out for glamorous photo shoot locations, you get my backyard garden instead.)

(Now that I cannot head out for glamorous photo shoot locations, you get my backyard garden instead.)

Here is my slinky red jumpsuit.

I’ve long admired the Zadie Jumpsuit by Paper Theory Patterns. I took the plunge, printed out 55 pages and painstakingly stuck them together. Then I whipped up a toile in some ghastly polycotton I had kicking about and adjusted from there. The first Zadie I finished I made from some pretty Makower cotton fabric that I stashed back in my tea-dress wearing days. The end result looked and felt like fancy pyjamas, so I took another look in my fabric stash.

And this is where the red slinkiness comes in.

I found 2.5m of slinky red viscose with a very subtle woodgrain pattern. I’ll be honest: the fabric terrified me a bit as it was enormously slinky, drapey and silky. I also did not know if I had enough fabric. I was making a size 18 with a few adjustments (more on that later) which called for 2.80m of fabric. Paper Theory Patterns tend to be extremely conservative with fabric consumption and I’d read that people had been left with very little fabric.

So, I went outside on the landing where I could spread out all the fabric and play Tetris with the pattern pieces. Leaving off the long sleeves meant I should be okay, but I still had to be ingenious and make sure the fabric wouldn’t slide around on me. I ghost-traced all the pieces on the fabric with yellow chalk and then went inside to my tiny kitchen table where I spent the next few days carefully cutting out the various pieces.

Zadie is a really good sewing pattern. It has relatively few pieces, it comes together quickly, and it looks incredible on a variety of bodies. I just had to fight my urge to rush through the cutting process as I knew I needed to take time with my fabric.

I made adjustments between the toile and the fancy pyjamas version, and I used the same adjustments for the slinky red one:

• I raised the crotch by 3” both front and back

• I used light interfacing to stabilise the neckline (others suggest stay-stitching it before doing anything else, but my fabric was so slippery that I wanted extra stability) and also the top of the pockets.

• I lengthened the belt by 6” (which obviously made the fabric consumption extra fun — I opted to piece the extra length together from scraps)

DSC_0099.JPG

Sewing the jumpsuit was a good learning experience. I was still terrified by the fabric, so I basted a lot (using the longest straight stitch on my sewing machine), pinned even more, and stitched the pieces together slowly. I opted for as much control as I could possibly get, though I never needed to pull out all the stops. I found the fabric beautiful to sew and the drape worked wonderfully with the pattern.

The only real snag I hit upon was the bias binding around the neckline. I’ve done bias-binding before on both quilts and on other dress-making projects, so I didn’t think it would be a major issue here as long as I pinned and pressed like a woman possessed. However, the fabric had other ideas. It simply did not want to be made into bias binding. No amount of cajoling or pressing helped. I did not have any fabric leftover to make facings, so instead I improvised (after consulting on Twitter). First I stitched the refusing-to-stay-pressed strip RS against RS, then I turned the strip over so it looked like bias binding and basted that %&^$£! piece of fabric in place. Stitching in the ditch kept the bias binding look on the RS and secured the fabric stitch on the WS.

Et voila! One slinky jumpsuit that fits like a dream. It is a date night outfit rather than something I’d wear everyday (a new & exciting addition to my wardrobe) and I’m proud of myself for using fabric that terrified me when I first saw it in my stash. If I recall correctly, I bought the fabric around 2011 in a sale for around £3 a metre, so that was a great purchase. Well done, past me!

I’m now working on a navy version of Zadie, using a heavier cotton/viscose mix that still has a lot of drape but which will also work as an everyday wardrobe staple. The fabric has a very slightly different RS and WS which has meant I’ve only been able to work on prep during daytime. I’m in the sewing stage now, though, so it should work up quicker now. I’ve lengthened the legs as I’m long-limbed and also drafted facings for the fronts which I think will work better in the long run. Patreon readers will know about my obsession with the everyday wardrobe and I’m thinking strategically about my dress-making even if it will be from my eclectic fabric stash.

I’ll be documenting my various makes here, so do stick around. It’s all terribly old school but I rather adore that. It’s a way of keeping myself sane during a period of time that is anything but sane. Let me know in the comments what helps you get through this extraordinary time.

So, You Want To Run A Craft Workshop? Tips & Tricks From the Trenches

Maybe you have been asked to run a craft workshop in your local library. Maybe a yarn shop has asked you to teach classes. Or maybe you teach regularly but feel like picking up a few tips. Either way, this blog post is for you.

Hello, I’m Karie Westermann and I teach knitting workshops. I teach all over Europe and I’ve been a mainstay on the knitting workshop scene for many years. Prior to that, I ran technical writing workshops at a university and taught Business English in various corporations. I’m also a qualified Adult Learner instructor.

First, a few things:

• This blog post will not give you a fully-formed class for you to run.

• I will not be teaching you how to teach. That is not my remit.

• I will primarily be talking about knitting, but this post is applicable to many types of crafts. If you are a quilter, stitcher, crocheter, or whittler, you will be able to take these tips and tricks and apply them to your craft. I’m just not qualified to talk about your specific craft.

designyourownshawl (1).jpg

Where To Start

So, you’ve been asked to teach or maybe you are pitching a workshop somewhere. Where do you start?

Begin by establishing learning objectives.

Let’s say you have been asked to teach Beginner’s Knitting. What learning objectives do you have for that topic? Make a bulleted list. It will probably look something like this:

  • Cast on

  • Knit stitch

  • Purl stitch

  • Decrease

  • Increase

  • Cast off

That’s a logical list of basic knitting skills, right? I’d argue it’s also very ambitious for a one-off beginner’s session, but that is a talk you need to have with yourself.

Remember: always question your own assumptions; you are not teaching yourself.

For each of these learning objectives, writing down exactly what you will be teaching and how. Think logically about how each learning objective feeds into the next.

  • Cast on

    Which cast-on is easy to master and won’t be hard to knit into? The cable-cast on requires the student to make the knit stitch already which might be a bonus, but might also be confusing because you are twisting the cast-on stitch and ..

  • Knit stitch

    Okay, so if I use the cable cast-on, I can use it as a springboard for talking about the knit stitch and how..


Turn Learning Objectives Into A Narrative

For every workshop you run, you should have a list of learning objectives. These objectives need to form a logical narrative where each learning objective feeds into the next. To your students, this narrative may not always seem obvious, so make sure to signpost during your class.

By “signposting” I mean that you need to explain why you are doing what you are doing. To use the example above, you explain that you chose the cable-cast on because it lets the student attempt a knit stitch before they even know that they are doing it. It is empowering as a student to realise that you already have (part of) a skill you are seeking to master.

Having an established narrative also helps you time manage. You know which story beats you need to hit in which order so that your student can leave feeling confident about their new skills.

Story beats? “.. the points of action upon which you hang your basic story. When you connect the actual individual action points, they build up to story..

By having identified objectives build into a narrative, you will have natural story beats to hit: the cast-on, the knit stitch, the purl stitch. This enables you to allot time to the various objectives and hopefully also make you think about how many objectives you can realistically slot into a workshop.

Why Learning Objectives Help You Help Your Students

This is important. Having established learning objectives also makes it possible to tailor workshops to each student’s needs as you can easily identify additional objectives if a student is ahead of the curve. Likewise, you can also pare down your list of objectives if a student want to dedicate more time to a particular skill.


Basic-Chart_main.png

Making Workshop Sheets

Handouts are important. I have seen a lot of handouts in my time — both when I take workshops myself and when I tidy up a workshop room at a festival. There are no right or wrong way of making handouts, but I have some tips.

Make sure the Workshop Sheet Supports You - Not The Other Way Around

One of the quickest ways to kill the flow of a workshop is to sit and read aloud from a handout along with the students, then walk around to see if they can follow the handout instructions. People might as well learn from a on-line tutorial together with a friend.

Use the handout to support your teaching, don’t let your teaching support the handout.

Make sure all the important points are covered in the handout, but the students are there to be taught by you rather than your writing. Show the techniques with your hands and then help your students. The techniques can be detailed in your handout, but the handout should never take precedence.

If you are teaching something less technique-based (say, Design A Sweater), you should have all the relevant numbers and details in your handout — but keep your teaching focused on your whiteboard and teacher/student interactions.

Likewise, don’t hand out 15 pages of dense text. That is not a handout; that’s a chapter in a book.

White Space & Layout

Leave plenty of space in your handout for notes. Students will want to write their own thoughts. Students might also find it easier to remember a technique if they can write down in their own words how they are doing something.

Make sure there are logical breaks in your handout (learning objectives, anyone?) and there is plenty of white space between sections. It’s a nice visual shorthand way of saying “hey, we are shifting gears here”.

If you are including a pattern with your handout, give it space to breathe.

Finally, some people like to include lots of photos in their handouts. I only add photos and illustrations, if they add to the narrative. Do not include visual clutter. Keep your use of fonts to a bare minimum as well.

Why A Good Handout Helps You & Your Students

If you use your handout as a crutch, chances are that your students will be so focused on reading the workshop sheet that they forget to listen to what you are saying. You will end up repeating yourself several times, losing valuable time to hit those beats.

A good handout leaves the students free to pay attention to you as you present a technique or explain a calculation, but also enables them to check back on something you said earlier. Crucially, the handout should support them when they are back home and want to refresh their knowledge.

The perfect handout is short, to the point, and helps guide you and your students through the learning objectives.

patternwriting.jpg

Some Tips On Class Sizing

There is no magic number when it comes to how many to have in your class. If you are relatively inexperienced, you might limit yourself to four or six. Sometimes the workshop room won’t take more than eight people. Sometimes the type of class limits the number of participants because it is extraordinarily hands-on (such as a spinning wheel class for beginners). I like having a lot of people in my workshops because it suits my teaching style and personality. There is no magic number.

Full-Day versus Half-day & Class Sizing

Running a class as a half-day class does not mean you should have half the number of students as you would in your full-day class. Running a half-day class means you should have half the number of learning objectives as you would in your full-day class. It does not reflect upon how many students you are teaching.

A full-day class should be thought of as an extension of a half-day class. You have the same narrative (“learn to knit”) but you can expand upon the learning objectives. I prefer to have the same essential narrative, but add more objectives within that narrative.

Remember this list?

  • Cast on

  • Knit stitch

  • Purl stitch

  • Decrease

  • Increase

  • Cast off

For a half-day class I would probably have it read as

  • Cast on

  • Knit stitch

  • (Purl stitch)

  • Cast off

And the full-day version would probably read something along the lines as this:

  • Cast on

  • Knit stitch

  • Purl stitch

  • Ribbing

  • (Seed Stitch)

  • Cast off

  • Understanding a basic pattern

It would look the same whether I was teaching six people or twelve people — or twenty-four. The rate at which someone is learning a new skill does not change. The only thing that changes is how much 1-2-1 time you are able to allocate.


How I Think About Class Sizing

I feed off the energy of my students when I teach. The more energy there is in the room, the better. When you teach, one of your tasks is to feed energy into the room: make the students curious, make them ask questions, and make them eager to take on the tasks at hand.

Class sizing is often thought of as “how many people can I realistically get around offering 1-2-1 tutoring”. I invite you to also think of it in terms of energy, about interactions, and about how you create a learning environment. You as a workshop tutor is just a catalyst — the person that creates a learning reaction in your students — and your job is to gather enough substance that your students can make that reaction happen. It is a terrible analogy, but one I often think about when I step into a workshop room.

So, rather than think about the (very essential!) 1-2-1 interactions you will need to have with your students, also think about what kind of class sizing enables you to provide the kind of learning environment that your students need. Some students are outgoing, other students are shy. How can you create a learning space in which both kinds of students are comfortable — and do so within the confines of your physical environment? How does that correlate with the number of students?

OneRowbtnhole_8.jpg

Some Basic Teaching Tricks & Tips

Finally, some basic tips and tricks.

Teaching is mostly about REMOVING the fear.

I’ve taught many, many different topics over the years to a huge variety of people. Underwriters, bankers, architects, design students, university lecturers, ad executives, politicians, lawyers, nurses, engineers, and so forth. It doesn’t matter which topic or in which context I’ve taught, everybody’s all got the same basic fear of learning something new. Children don’t really have this fear because everything is new, but once you reach adulthood that fear creeps in.

The important thing a workshop tutor needs to do is break down that fear. Granted, craft workshops are not the most troublesome because people have generally chosen to participate, but there is still fear of the unknown and fear of looking/feeling stupid. Occasionally you will also encounter lovely students whose participation in the workshop is their way of facing other fears.

Creating a safe, loving, and kind workshop environment is your top priority.

How do you do that? I like getting to know people in my class and finding out where they are coming from. Then I am just my own goofy self and tell my goofy stories. It seems to work. You will want to find your own approach and figure out how to make your students feel comfortable enough to make mistakes in front of you.

Find Your Teaching Style And Personality

You need to be able to project your voice and control your classroom. Sometimes you will be facing ten rowdy knitters who are all hell-bent on driving you insane (in a good way), and you need to be able to command attention. Because you have 30 minutes left and they still need to learn how to cast off.

Over the years there have been many talk about different teaching styles and learning styles. I happen to think these styles are mostly snake oil being peddled by companies wanting you to sign up for useless courses. However, you can take what’s useful from these models and discard the snake oil aspects.

  • Expert/Authority: Best exemplified by the quilting workshop tutor I once had who snarled “I’ve been doing this for forty years!” at a workshop participant who asked a question. Please do not do this. If you need to set yourself up as an authority during a workshop, something has gone terribly wrong. You should know your subject matter very, very well and if you get a question you cannot answer, say that you simply do not know but you will look it up and help them find the answer. There is much more authority to be found in that style of teaching than in asserting superiority based on numbers you’ve been teaching.

  • Formal Teacher/Lecturer: In craft workshop terms, this is suited for show-and-tell events rather than hands-on learning. If you have a fascinating story to tell, a slideshow can be a great way of engaging with people. If you want to teach a particular knitting technique, the lack of student interaction will be a massive drawback.

  • The Delegator: if you have groups of students that are at very different levels, it can be a useful technique for keeping everybody happy. Say, you are teaching Shetland lace shawls: one group of students has knitted a lot of lace and is keen on getting to the next level; the other group has never knitted any lace before but is keen on getting the basics. Delegating different learning objectives to the different groups is a great way of keeping both groups on their toes without alienating anybody. It also lets the students interact with each other which can be very giving and fruitful for everyone concerned. I tend to pull the groups back and give them a common learning objective after a while. It is important not to let the workshop become one big group work session.

  • The Facilitator: Encouraging students to ask questions and giving them hands-on tasks that’ll give them moments of self-discovery should be core skills of yours. This style of teaching is best if it leads to workshop discussions and student-to-student interactions. It is a lot harder if the layout of the room has students sitting back-to-back. Facilitating knowledge can also be hard for some students who expect you to lay down the law regarding techniques. I find this style of teaching is fantastic if you are running classes that encourage curiosity and creativity; less fantastic if you are running classes where there are definite answers to definite questions.

As the workshop tutor, your job is to blend these styles (and the many other styles you’ve observed over the years) with your own personality — and the workshop you are teaching.

In terms of finding your teaching personality, you might find that you will adapt aspects of your personality. I am incredibly shy when I am not teaching and I find it difficult to make small-talk. However, as a teacher I am goofy, open and warm. I emphasise aspects of my own personality that are usually bubbling away under my shyness and pull out personality traits that only my close friends know.

Record Yourself

Set up a camera and film yourself while you are teaching. You might want to rope in a few friends and practise on them. How do you come across? Do you need to work on your voice projection or do you need to quieten down, so you give other people a space in which to talk? Do you facilitate a learning space or do you delegate a space? What is your body language like?

Remember this: you are not the focal point of the class; the learning objectives should always be the core to which you return.

DSC_0842.JPG

I hope this helped. If you have any questions or queries, please leave a comment below!

I’ll be updating my workshop schedule later this week, so keep your eyes peeled for that. And if you like my writing, you can join my Patreon for essays on making and creativity.